Saturday, January 26, 2013

Good start

Steve worked from home yesterday. He used his extra two hours of home time to get started on the wainscoting in the hall. He is off to a great start. I can't believe what a difference it makes already.

Here is what he got done yesterday 


The next part is the tricky part. We are still trying to figure out how to the stairs should look. Here is what we are working with.


This might take a while.  Its kind of like a jigsaw puzzle.

Saturday, January 19, 2013

powder room


After the crazy excavation in our family room, powder room and entryway we got to pick out a new floor. We picked out a gray stone looking ceramic tile. We did not do this our selves. We had a brand new baby and a two year old that kept us both busy and I was recovering from a c-section. Getting back my usual DIY shape took a while.

Anyway we did decide to take this opportunity to redo the bathroom. I did peel some wallpaper but Steve did the rest.  He found a picture frame from the barn sale we go to and spray painted it (I picked out the paint) then he attached it to the mirror. We picked out a small vanity to replace the elementary school bathroom sink. We also got a wainscoting kit and then painted the top half. So here is the before and after:

Here you can see the new paint, wainscoting, vanity, floor and the frame Steve added to the mirror.
                                       And here is a terrible picture of the new light fixture


The other project we have going right now is the entry way. Here is the before, from the opposite side of the hall:

 This is after we removed wallpaper. We did paint it a very boring cream color and then left it for a year. We hated it so now we are re doing it.
So here it is with the kitchen doors removed, crown molding added and molding added around the door into the living room. Today we painted the bottom half white and we bought the materials to add the wainscoting.  It has a long way to go but it already looks a lot better. I can't wait until its done!

How jackhammering through your house can induce labor.

Our neighborhood has a high water table so a lot of us here have damp basements. The summer we moved in was soooooo rainy and the basement walls were  wet in several places all season.

However the following spring and summer (2012) were very dry and most of the basement was drying out. So we were very perplexed when we saw this huge wet spot on the basement wall:


This wall runs along the side of the main part of the house and borders the part of our house that is on a slab. The rooms on the slab from front to back are the garage, the bathroom/laundry area, and the family room.

We had seen this wet spot before but at the time the whole basement was damp so we didn't think much of it. But in the middle of this early summer drought we were confused. Then suddenly it hit us, above and behind this spot is the powder room/ half bath on the main floor. We called a plummer right away.

The brilliant design of our plumbing system has the main waste pipe for the house running under the the slab floor through the garage bath/laundry and family room to the back of the house.  The plumber accesed the pipe in the garage and scoped it and the whole thing was filled with water.

So here I was 38 weeks pregnant and a plumber is telling me he has to dig up the cement floor through the entire length of my house front to back. Yay.

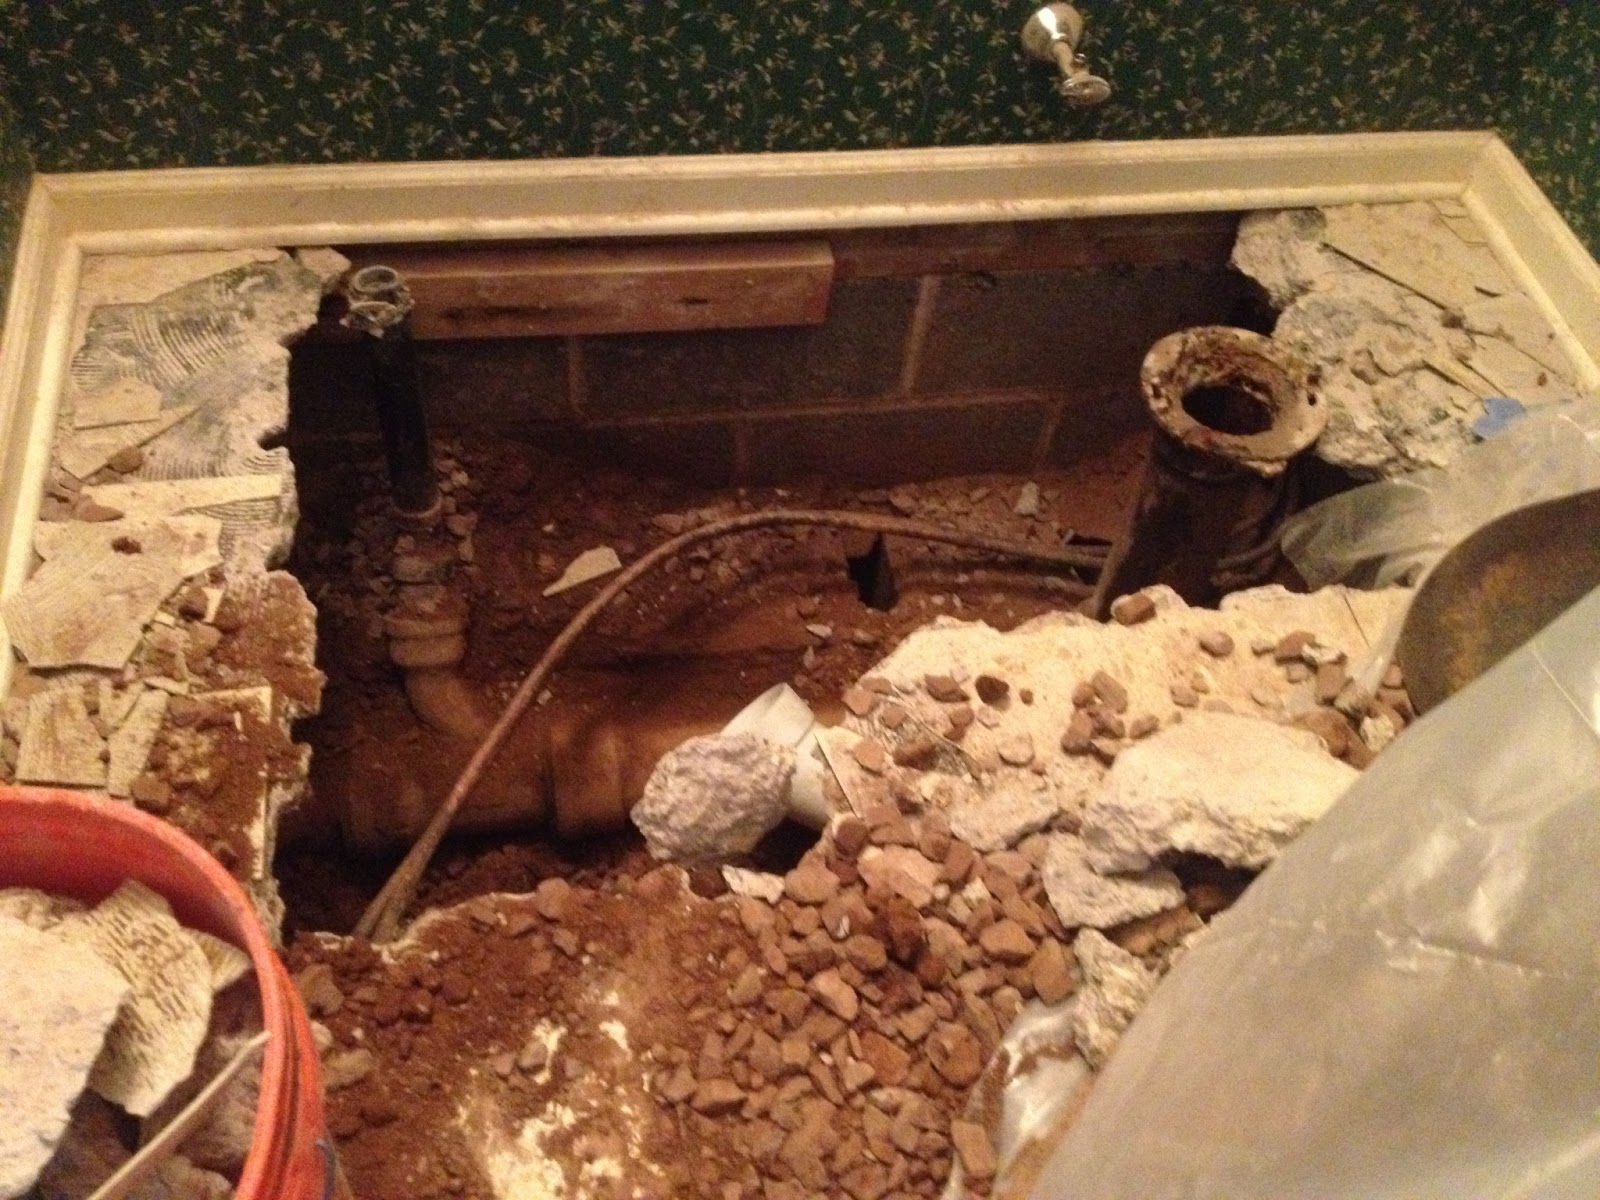
The pipe had rubber gaskets that had ruptured and so the pipe was zig zagged up and down. Then once they ripped up the floor they discovered HUGE hole in the pipe at the bottom of the toilet. That is exactly what was was causing the leak. Gross. Our basement wall was soaked in poop water.

Thank goodness for home owners insurance because this was NOT a planned expense.  The only good thing that came out of it is that insurance paid for a new floor in the laundry room, garage entryway and powder room, and that it prompted us to re-do the powder room.  Here is the lovely photo documentation:
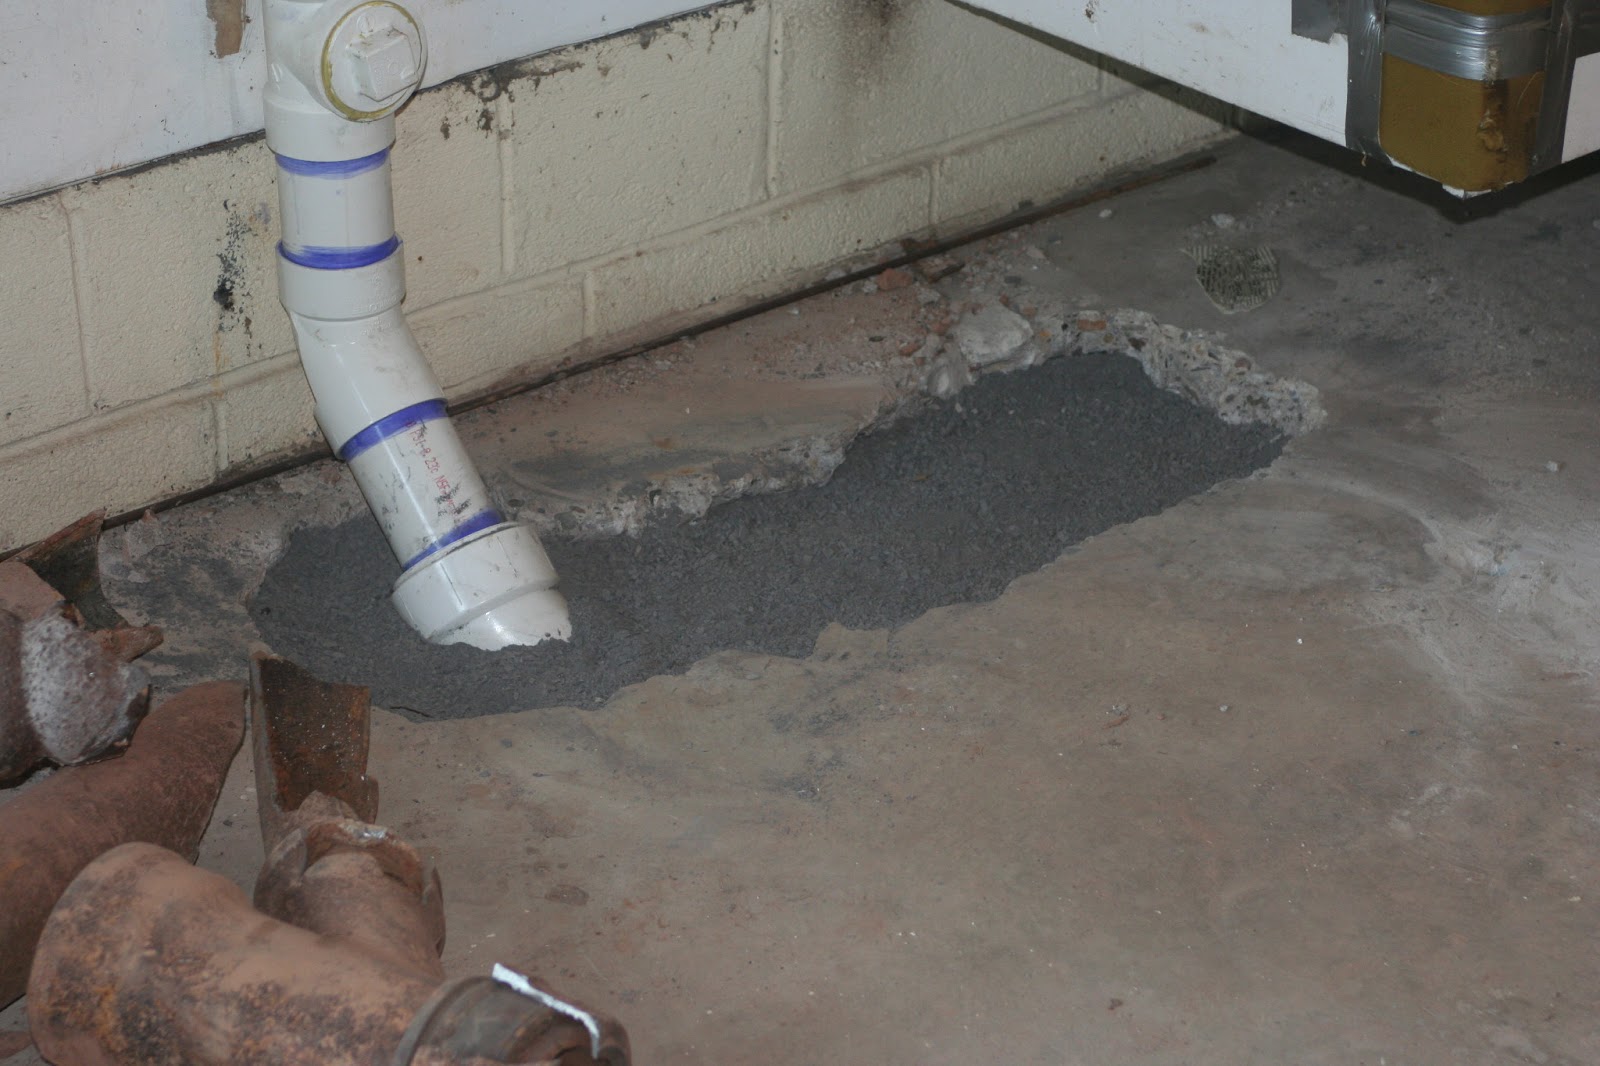
 The start of the waste pipe comes from the upstairs plumbing and goes through the garage. It broke as soon as they started jack hammering the cement.

What our bathroom looked like after day 1


Our family room after day 1. The waste pipe is lying at the bottom of this trench. To the right is our kitchen.

 The trench from the other side of the room

 Close up of the powder room showing  the pipe that had the hole at the bottom.


 The "bridge" from our entry to the garage.


A very pregnant me pointing out the broken pipe.


If you look at the very bottom middle of the T pipe you can see the giant hole that was spilling yuck into the ground that eventually seeped into our basement wall. bleeeehhhh I still get shivers thinking about it.


                                                          Yay new pipes!!!


 Backfill and cement


 So eventually they fixed the cement and cleaned up. The last bit of cement was finished exactly 12 hours before I went into labor.  The cleaning company we hired arrived at the house just as we were leaving for the hospital.   It took an entire month before we had our carpet cleaned, and reinstalled and all our furniture back in the room. But at least we didn't have any heavy construction happening when Clark came home from the hospital.

So we survived and looking back 6 months later I was astoundingly calm for the situation I was in. I do suspect that Clark arriving 5 days early had something to do with the stress of the whole thing. After all Ev was 2 weeks late!
 But all is well and the home improvement carries on.  Later I'll try to post pics of the now updated bathroom.

Friday, January 18, 2013

3 little updates

When we found out Clark was coming we first had to move Everett into what was the spare bedroom:

The carpet was already out of this room but we had to remove the wallpaper, paint, and decorate. We have yet to add the crown molding but here is a peak at his room now:


Then we removed the wallpaper from the room Everett was sleeping in (this is the room with the old carpet and previous owners furniture. I don't have a pic of it when Ev was sleeping in there):

 We painted and decorated. We also still have to add the crown in this room but here is another  wallpaper free room.

Another little update was some toy organization. I know this doesn't look super organized but its a huge improvement from before when it was just piles of milk crates in the corner.  We talked about doing some custom built-ins but Steve and I couldn't agree on how the room would end up being long term (someday we want to add windows and reface the fireplace...SOMEDAY!) So we ended up with some Target storage shelves and fabric bins. It works great and wasn't so expensive that we will feel guilty eventually replacing it. Some of the bins have picture labels on them so Everett can put things away on his own. He's been doing a great job with it too!


Next time I'll fill you in on the 30 foot trench we had dug through the middle of our house just days before Clark was born. THAT was TONS of fun!

a very cute side project

So shortly after I started this blog I found out I was pregnant.  It sidetracked me a bit and I totally stopped posting once the whole "morning" sickness (in my case afternoon sickness) and bionic super sleepiness set in.  Anyway this is our little side project, Clark:

There has been lots of work going on in our house this last year but I just haven't taken  the time to blog about it. Today  my sister asked for the link to this blog so she could show somebody our cabinets. I thought I would make an attempt to update it. We are slowly wiping the 70's out in this house room by room. But where we left off was the kitchen.
BEFORE:
When I last blogged:


And here are a few recent updates. 1. our fridge and microwave died  so we had to replace them. It really wasn't in the plan but when you need a fridge you need a fridge. So we have new stainless steel appliances. Steve also replaced the pantry door with chalkboards. I love it!


 Then Steve and his brother put crown molding in. They did a great job and it makes a big difference to the feel of the room.


 We also HAD to, simply could not pass up this kitchen cart from Crate & Barrel. It has the exact same pulls and trim work on the doors as our cabinets have now. We previously had an open bottom cart from Ikea. Everything under there was always dirty and had to be rewashed before using. This is a much better solution. It also has a fold out section on the back side, and towel rods.

 We also converted from oil  heat to natural gas so we got a gas stove.  This is such an improvement. I know some people love electric but I burned EVERYTHING on our old stove. Now  I only burn about 1/4 of our meals.
Its not fancy or top of the line but I'm really really happy with the updates to our kitchen. It made such a difference in the feel of the entire house. Its my favorite room right now. But we have a long way to go to get the rest of the house to catch up. I'll try and post about some of the other projects we have "mostly" completed, and the ones that we are in the middle of right now.

Wednesday, November 16, 2011

Long time no post.

Its been almost a month since I've posted!!!
I guess I'm not a very good blogger.

Anyway its been side track after sidetrack. First there was that crazy October snow storm and two full weeks of clean up. We lost a lot of branches. Halloween kept us distracted from the kitchen, as did our fall leaf clean up. Then last weekend we finally finished our move. We had a basement and garage full of stuff left up in Bloomfield and we finally rented a u-haul and got it done.

So what have we accomplished in the kitchen? Here and there we managed to do some work. The cabinet doors are all on, the new pulls screwed in and most of the back splash is up (but not grouted yet.)

Here is how it looks.


The only part of back splash that isn't done yet is the part behind the stove.  There is a bit of a story to why. It actually was done at one point and we had to take it down.
When I went to get thin set for the tiles the guy at home depot talked me into buying this...


It is like double sided tape for tile back splash. It was really really easy to put up the mat on the wall. It was easy to cut to the right size and it stuck really well. No mixing, and you didn't have a limited amount of time before drying like you would with thin set.

The tricky part is actually putting the tile up.  Our tiles are penny round on a 12 inch square mesh. If we were using subway tile or individual square tile it would have been perfect. Since the mesh is flexible you have to line up several spots before you press it on to the glue. Once you press it on it is stuck. There is no adjusting. Thin set would have been more forgiving with tile adjustment.

So I was putting the tiles up while Steve was at work and Ev was napping. One mesh sheet of tiles didn't quite line up right. I tried to make adjustments as I went and continued putting up tile. It was a mess, not level and unevenly spaced. So we had to rip the whole thing down.  Luckily we have enough spare mat and tile to replace it.  We have to sand the drywall seal it with primer and try again.

Then we can finally grout the tile!

Once that is done we have to finish getting the wallpaper off and then we can paint.

I'm thinking that our goal of getting this done by Christmas was a good choice. We've slowed down significantly. Working on the kitchen all weekend every weekend and every night after Ev's bedtime got to be too much after a while.

Its not done yet but it looks like a totally different room!

Thursday, October 27, 2011

Want to help?

Our backsplash tile came yesterday and although it's a slightly different color than I imagined it would be ( that's right, we just ordered it no sample. The price was right and I am impulsive) I LOVE it!!!

Here are the colors for all the materials in the kitchen so far.

White cabinet, hickory wood floor, moss penny round tile, stone-ish laminate counter.


Sooo I need help! What color for the wall. We're thinking a grayish blue or a teal-ish sea blue. Maybe something like this?


Ideas? Please share!

Wednesday, October 26, 2011

baby steps

After the big push on the weekend we put in the floors counter and sink we were exhausted.  We kind of slowed down the pace.

Over the week Steve cut and glued the rest of the wood for the doors. We had a few issues with wood bending or moving as the glue dried despite 6 clamps on each door. So we filled the cracks with spackle and sanded the uneven spots down.  

Then over the weekend we primed the doors.  The only other project that got done on the Kitchen this past weekend was Steve finishing the floor in the closet.  
It was a gorgeous weekend so we spent a lot of time outside raking leaves and chasing Everett around the yard. We also discovered that we think we had(have) grubs. Grubs turn into Beetles right? Well our yard is crawling with big yucky Beetles, patches of dead grass, and little mounds with holes where I assume the icky things crawled out from the ground. Boo. Now we have to figure out how  and when to handle that problem.

Anyway during the week we have been slowly putting paint on the cabinet doors one coat at a time, one side at a time. Maybe they will be done by the weekend.

Catching up

I'm a little behind here... not this past Saturday but the Saturday before we put in most of the hardwood floor.
That Sunday morning we ran out to Lowes and picked up counters, a sink and a new faucet. 

When we got home Steve's parents came up and we finished putting in the rest of the floor on the cabinet side of the kitchen.  We also  did some of the detail cutting on the floors. This was tedious and time consuming but it looks good in the end so it was worth it.

Then we brought the base cabinets back in and fastened them to the wall.  

Next we put the big counter on top and tried to figure out where the sink hole would go.  This got complicated and took a long time because it was a tight fit and we only had one chance to make the cut right.


Again we lucked out and it worked.  

Then Steve and his Dad made a cut on the small counter to make it the right length to fit.
  

It took forever to get the counters fastened in to the cabinets. I had to stand, and sit on the counters to get them to push into place while Steve screwed them in. I wish I had photos of this, it was quite a scene.  
Finally the sink was in, the plumbing was reconnected and I had a working kitchen.  I'm really happy with how it looks and I can't wait to put the doors on and pick out a back splash.


Thursday, October 20, 2011

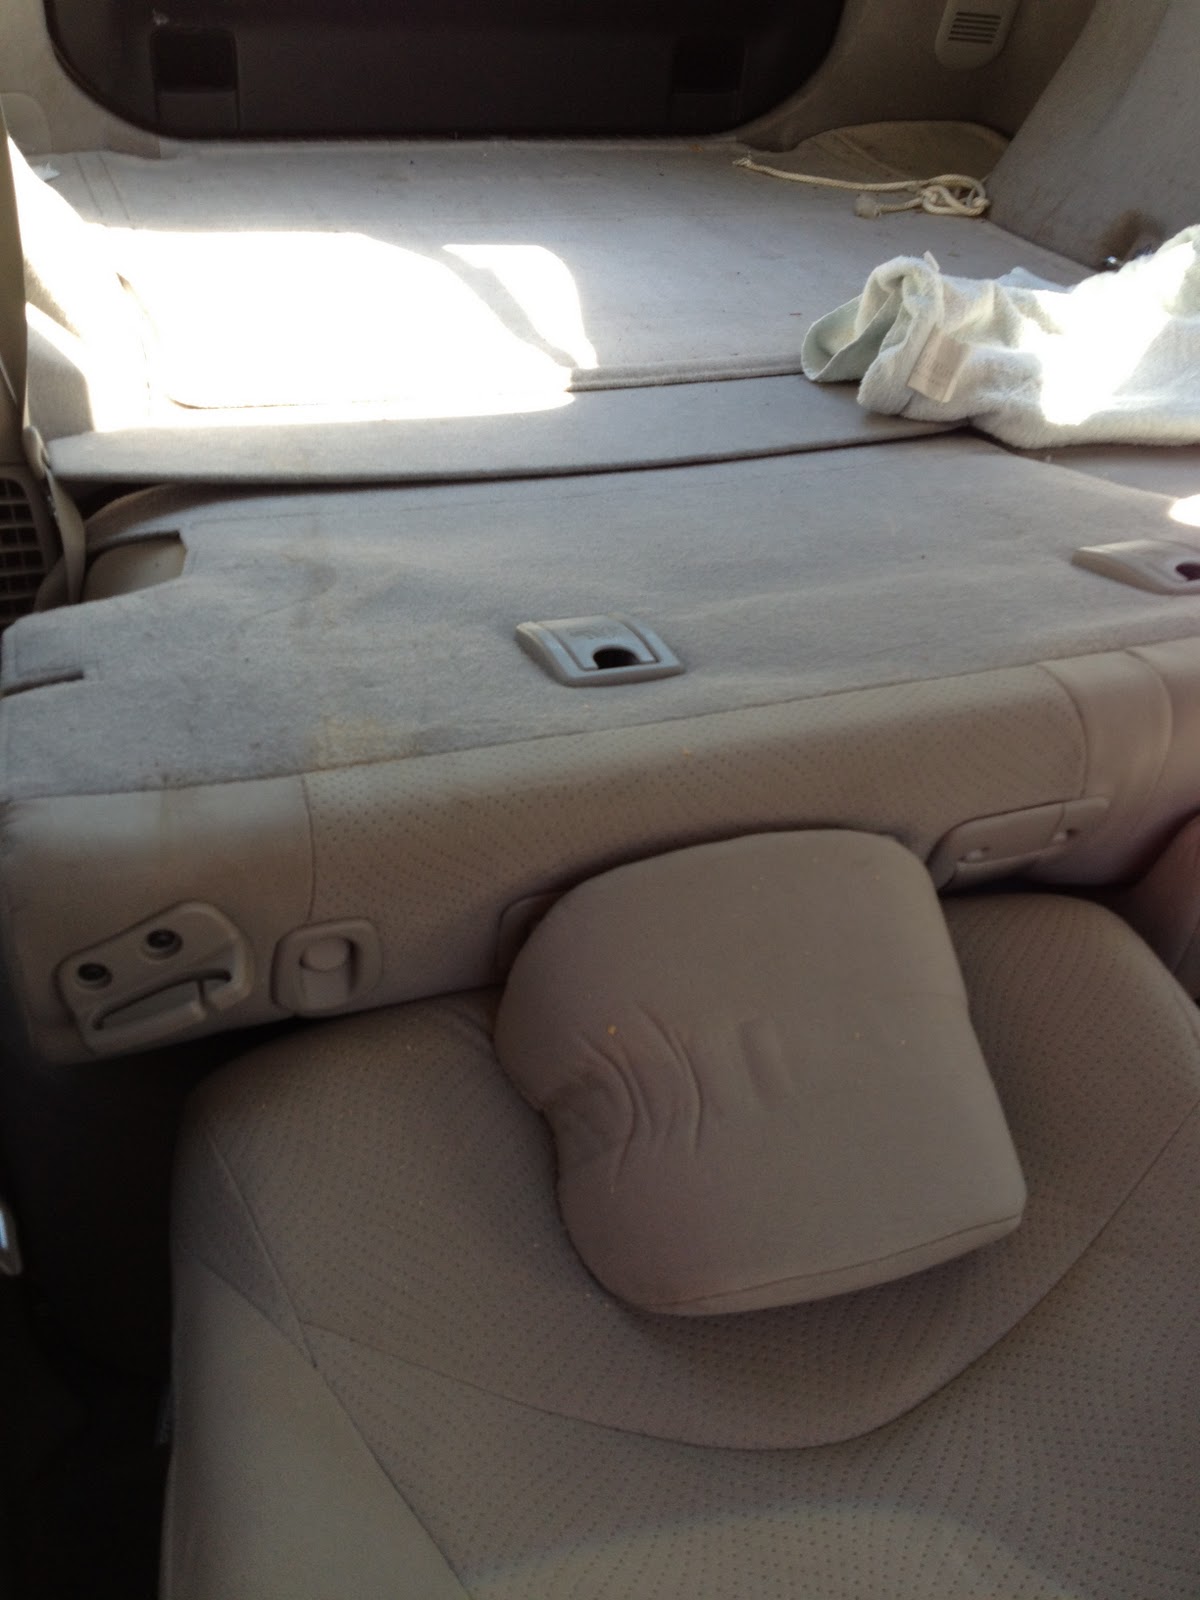
How to fit 16 feet of counter top in your Toyota Prius

1. Go to Lowes and purchase a 10ft and 6 ft section of corner cut laminate counters for a very reasonable price.

2.  Remove the headrest from the front seat and fold the seat all the way back.


3. Fold the back seat all the way forward over top of the front seat.


4. Slide in the big counter.

5. Scramble around looking for sweatshirts or towels to cover the big counter so it doesn't get scratched and slide the little counter on top.


6. Tie up the tailgate.


7. Bring the counters home!


I love my prius!